Table of Contents
- Router and Switch Configuration Benefits
- What Is a Switch?
- How to Configure Router Settings
- Switch and Router Configuration Management for Business
Changing the settings on your router can feel like a daunting task. But as most IT professionals know, default settings aren’t necessarily the best settings, even if abiding by them requires zero effort or intervention. Default settings tend to be insecure and are rarely the best option for supporting network connectivity. As is the case with most hardware, there are always hidden features waiting to be taken advantage of by an ambitious IT pro. Adjusting your IT infrastructure settings is important for optimizing and securing your network, whether in a small business or corporate environment.
In fact, you don’t have to be an expert or even particularly technology-savvy to make the most of the router settings options available to you. With the right advice in hand, you can configure router settings to suit your organization’s individual requirements.
In this guide, I’ve outlined several best practices to help you figure out how to reconfigure your routers and switches. I’ve also focused on basic settings for those of you getting started with adjusting your network hardware. And if you’re looking to build on this information, I suggest investing in a software tool like SolarWinds® Network Configuration Manager, as an automated tool goes a long way toward optimizing and managing network configurations and changes, especially for larger networks.
Router and Switch Configuration Benefits
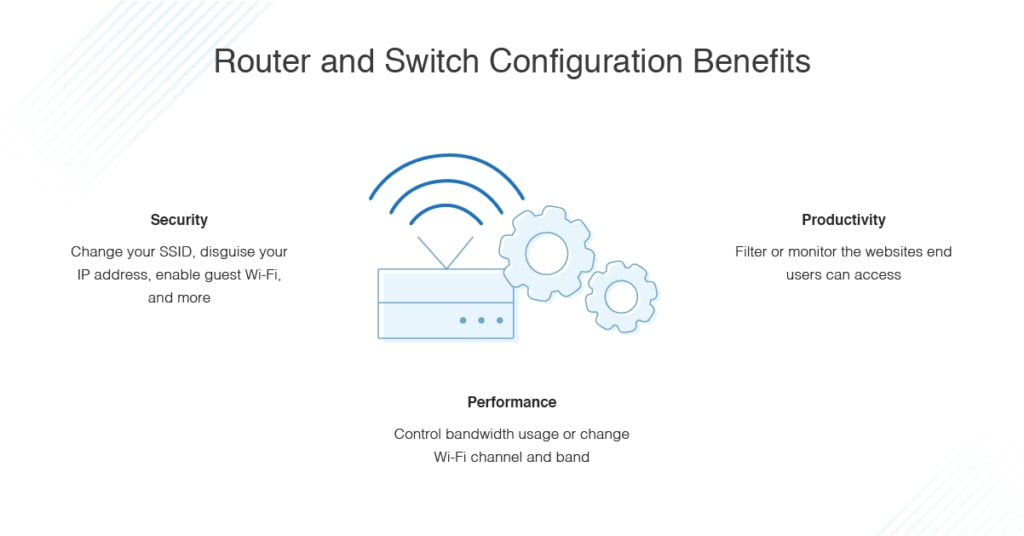
One of the great advantages of router and switch configuration is you can increase security in several ways. The most basic thing you can do is change the router password from its default to something more secure and unique. This prevents hackers from accessing your router settings. Via the router, a hacker could potentially disable wireless security for your network, meaning they could access sensitive or confidential business data without you ever knowing about it.

Changing the Service Set Identifier (SSID), otherwise known as the network name, is also an option. Changing your SSID makes identifying your network much faster. Secondly, some routers will have a default SSID to identify the type of router being used, which can make it easier for hackers to attack your network. While it’s a small change, switching your default SSID should still be on your list.
You can also configure router settings to disguise your local IP address. You can change your IP address by tweaking your settings. The most common reason for doing this is to protect your anonymity online, making it harder for your activity to be traced back to you. This is another useful security benefit, although not necessarily a top priority for business purposes.
You’re also able to configure settings to enable multi-SSID and guest Wi-Fi. Most modern wireless routers are capable of broadcasting more than one access point simultaneously. A single access point can be available for known and trusted devices, while a separate access point could be used for guests. The most obvious benefit of this is you won’t need to share your main Wi-Fi password with strangers or guests, reducing the risk of network abuse or overloading. You can also configure router settings to show you who’s connected. This can be useful because people stealing your bandwidth can result in low or fluctuating internet speeds.
Router programming allows you to change Wi-Fi channel and band, which can improve your Wi-Fi performance and coverage substantially. A lot of wireless routers select the channel for you automatically when you initially set them up. This selection isn’t tailored to your individual wireless environment and can often lead to interference or slow Wi-Fi speeds.
Certain routers let you set up “parental controls” or block employees from accessing certain types of websites. If you’re dealing with a personal, at-home network, setting up parental controls protects your children online, keeping them from being exposed to adult or inappropriate content. For business networks, you can filter certain types of websites—like online shopping or video streaming sites—to encourage employee productivity. In either case, controls are split into two categories: monitoring and filtering. Filtering lets you choose what users are able to access, while monitoring lets you view what sites users access.
In addition, many people don’t know you can activate remote management via the router settings (if your router offers this functionality) allowing you to manage your router from anywhere, via your smartphone or another device. Remote management is turned off by default.
With these benefits in mind, I’m going to outline how to configure router settings to make the most of the options available. But before I do, I’m first going to briefly explain what a switch is and why you might want to think about switch configuration.
What Is a Switch?
Switches can be used to connect numerous devices together on the same network. Local area network (LAN) switches are used for controlling and directing the data flow to networked resources, at the level of the access layer. A switch is sometimes referred to as a network bridge.
Why would you want to configure a router as a switch? Every year, Wi-Fi technology becomes increasingly advanced, which means your old router might soon be unable to support your current Wi-Fi needs. But this doesn’t mean it’s useless. The Ethernet networking element of the router remains useful, allowing consumers to use it as a network switch. A switch is useful whenever you want to share an Ethernet cable between numerous devices.
How to Configure Router Settings
As this guide has already explained, router programming has numerous benefits. Below, I’ve given a short explanation of how to get started configuring router settings according to best practices.
Accessing Your Router
Before you can learn how to configure router settings, you’ll first need to know how to access them as an administrator. If you’re using the network also used by the router, then this is the first thing you should try; go to your web browser and type in the following IP addresses, one after the other, into the search bar.
- 168.0.1
- 168.1.1
- 168.2.2
- 0.1.1
- 0.0.1
- 10.1.1
If a welcome page pops up, or a login window, then you’re in. But if these IP addresses don’t give you access, then you’ll have to go through the longer process. First, go to your settings and click on “Network & Internet.” Then select “View your network properties.” You should see “Default gateway” and a number beside it. This number is your router IP address. Type this address into your web browser’s search bar and a login or welcome page should appear.
From this point, you’ll need to log in as an administrator. Admin info should be on the back of the router.
Changing Router Login Info
This is an important security factor. To change your router’s password, follow these steps:
- Access your router settings by inputting your router IP address into your browser
- Log in with router username and password
- Visit “Settings” and click on “Change Router Password”
- Input your chosen password (keeping in mind a strong password should have at least eight characters and feature letters, numbers, and special characters) and save the new settings
Changing Router IP Address
These instructions are for D-link routers, though the process is likely to be similar for other router types.
- Access your router settings by inputting your router IP address into your browser
- Log in with router username and password
- Visit “Settings” and click on “Network settings”
- Type in the new IP address under “Router Settings” and save the changes
- Note, you won’t be able to use the old IP address to access your router settings anymore
Changing SSID
This process will teach you how to change your SSID, or network name, to something more memorable.
- Access your router settings by inputting your router IP address into your browser
- Log in with router username and password
- Visit “Setup” and click on “Wireless settings”
- Input your new SSID and save the new settings
- You’ll then have to wait for your router to restart
Configuring Guest Wi-Fi and Multi-SSID
These following instructions are based on NETGEAR router settings, but again the process will be similar for other router types.
- Access your router settings by inputting your router IP address into your browser
- Log in with router username and password
- Visit “Guest Network” and make sure the “Enable SSID Broadcast” check box is ticked
- Name the guest network and select a security option, then click “apply” to save the settings
Activating Remote Management
To access your router remotely, follow these instructions:
- Go to your router’s administration panel
- Visit “Settings,” then “Remote Management”
- Turn remote management on and save the settings
Gaining Visibility of Who Is Connected
- Access your router settings by inputting your router IP address into your browser
- Log in with router username and password
- Visit “My Network” or something similar. It may also be under “Attached devices”
- If you see an unfamiliar device you don’t think should be connected, ban its MAC address
Changing Wireless Band and Channel
Before changing your wireless band and channel, carefully consider what would be most suitable for your needs. For example, if you have a new router supporting 5GHz bands, this is probably a good choice for you as it will probably be less crowded. This means it’s a great option in densely populated areas. To change these settings, follow the instructions above to access your router settings and visit “Wireless Settings.” You should be able to tweak band and channel from here.
Setting Up Parental or Employee Controls
Setting up filtering or monitoring controls is simple. These controls should be under router settings, though keep in mind they may have a dedicated category within the system. In some cases, you may want to download a specialized program to integrate with your router for more fine-tuned control. Either way, I’d recommend setting up a PIN or password for access to these controls, so users can’t change the settings themselves.
Switch and Router Configuration Management for Business
Router settings are an extremely valuable and versatile resource. You can use it to boost security, eradicate vulnerabilities, and even speed up your connection. But managing all your configurations manually can be difficult, especially for larger networks. Checking to see if router configurations are accurate and optimized takes time, and if you’re handling other network hardware as well, the task can quickly become overwhelming. As a result, you may overlook router and switch configurations for a little too long—putting business networks at risk.
That’s why I recommend using an automated tool capable of tracking and managing device configurations and network changes like SolarWinds Network Configuration Manager (NCM) or Kiwi CatTools®. Below, I’ll describe the benefits and differences between these two solutions to help you better understand what tool is best for your network.
SolarWinds Network Configuration Manager – Medium and Large Networks
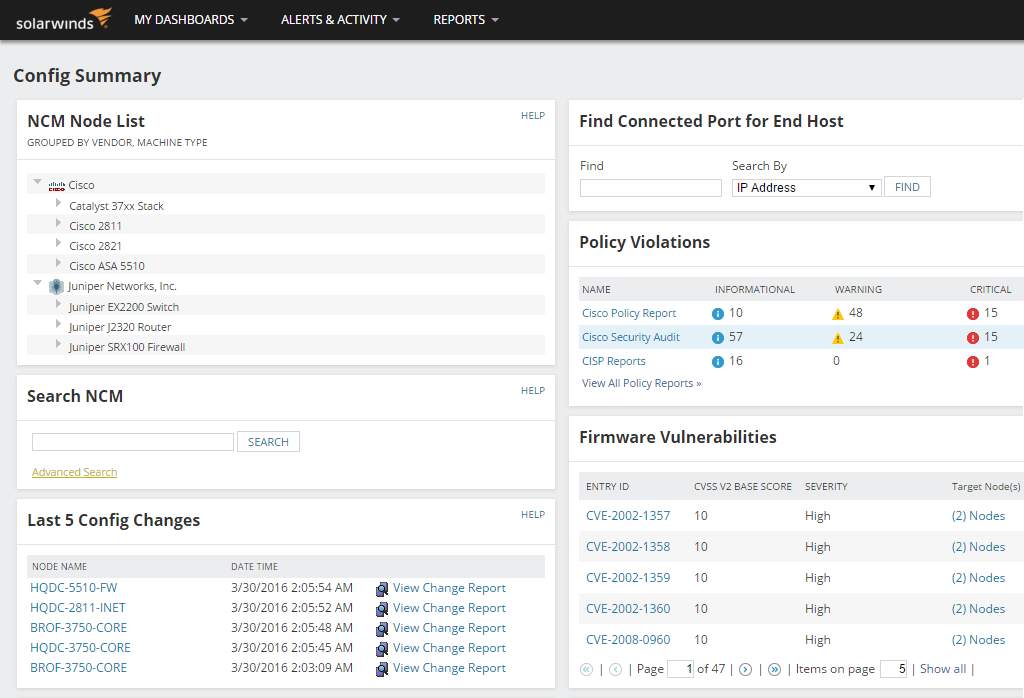
NCM is an enterprise-grade tool designed to implement routine and wide-scale changes by utilizing device-neutral configuration templates and allowing you to easily define the changes you want made. The program then uses the directives in the configuration template to create device-specific suites of change commands. You can review these changes and deploy them on a scheduled basis. All configuration templates can be reused and defined by user, so they’re great for saving time on routine alterations.

A major cause of network downtime is human error. With Network Configuration Manager, you can automate processes and gain visibility to better avoid manual configuration errors potentially leading to network interruptions. You can set permissions and roles to ensure the right users are making configuration changes. And you can get instant insight into configuration changes, so you always know what changes occurred and who made the change. You can even search, troubleshoot, and audit standardized configurations.
With SolarWinds Network Configuration Manager, you can expect to implement router and switch configurations more accurately, with less manual effort—and you can more easily confirm your settings remain in place over time. This tool is great for business use and comes highly recommended. If you want to give it a try, a fully functional 30-day trial is available.
Kiwi CatTools – Small Networks
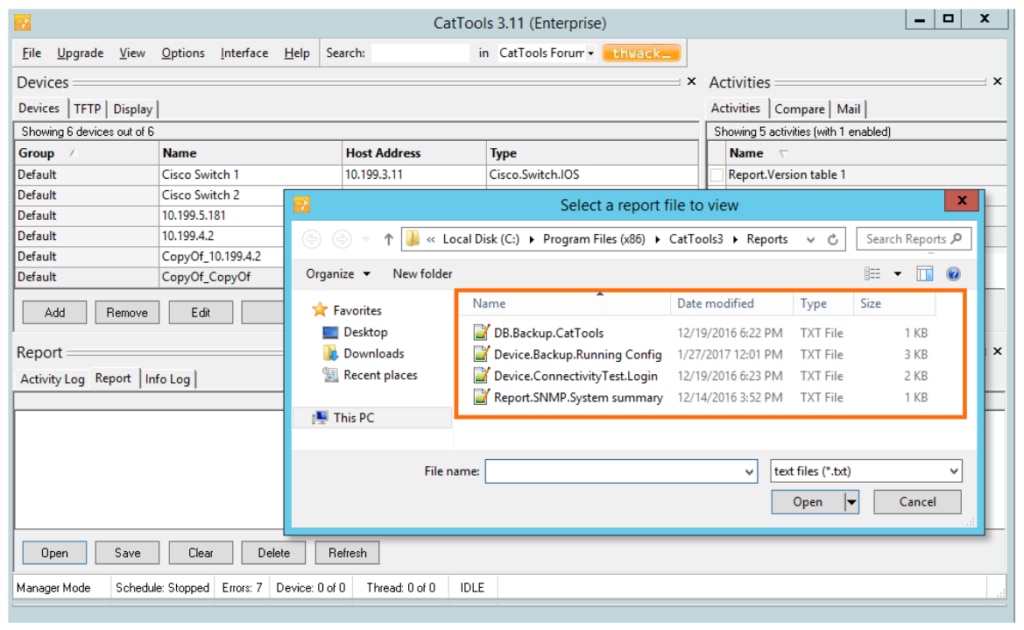
A powerful network automation and configuration management tool built to support small business networks, Kiwi is an affordable solution for companies of all sizes looking for the ability to more easily push configuration changes, track changes on network devices with alerts, revert to previous configurations, perform basic config change reporting, and automate backups on routers, switches, and firewalls.

Kiwi CatTools has out-of-the-box support for a lot of IPv4 and IPv6 devices, such as Cisco, HP, Huawei, Juniper, and more. Kiwi supports your ability to more easily troubleshoot issues by allowing you to compare the configurations of two devices, like startup and running configurations, to help ensure the success of your network. Using a built-in TFTP server, Kiwi can also provide an easier way to push configuration changes on multiple devices at the same time. You can also try the tool for yourself free for 14 days.


